Learn the best times for planting garlic and the pros and cons of plating in the fall versus the spring.
Planting garlic is both an easy and a difficult topic to tackle. Like many things, “it depends” is often the answer to many questions due to variables such as where you live, what type of garlic you’re planting, and what your goals are.
The mechanics of planting garlic are pretty simple: dig a hole a few inches deep, keep about six inches of space between holes, plant cloves with the flat side down and pointy side up, and cover with dirt and mulch.
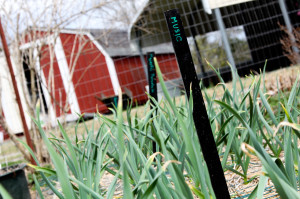
As far as the best time of year to plant garlic, most growers recommend that you plant in the late fall, usually in October. Your growing zone and climate will have some impact but if you had to pick a month that works universally, October is your best time to plant garlic.
Planting Garlic in Fall
Fall planting results in larger garlic heads when you harvest the next summer and ensures that garlic gets the vernalization — a fancy word for cold exposure — that it needs in order to kickstart its growth when spring arrives.
Garlic is extremely hardy and can handle multiple freezes and frosts so you don’t have to worry about trying to time freezes in the fall.
Spring Planting of Garlic

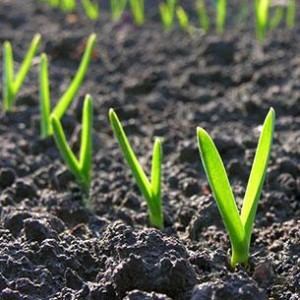
It is possible to plant garlic in the spring for harvesting in the same year but it takes more care and planning and usually produces smaller heads of garlic and smaller cloves.
The trickiest issue if planting garlic in the spring is making sure it gets the vernalization it needs, as it needs some cold exposure to end its dormancy.
This can be accomplished by planting in early spring if you’re reasonably certain you’ll get another freeze or cold snap or by keeping garlic bulbs in a refrigerator or freezer for a week or two before planting.
Some garlic varieties will perform better when planted in spring than others and climate plays a large role as well.
Fall planting will be your best bet but spring planting can work if you’re willing to take precautions and experiment to see what works best.
Planting Large Amounts of Garlic
While the basic instructions outlined above — dig a hole, put garlic into hole — works well for small amounts of garlic, planting hundreds (or even thousands) of cloves can quickly become a chore.
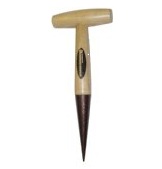
One basic tool that is often overlooked is a planting dibbler (also called a dibber by some), which is a handy little tool to have around if you’re going to be planting lots of garlic over the years.
Dibblers are straightforward so we shouldn’t have to explain how to use one. Some people balk at buying such a simple tool when a stick or even your fingers will suffice but dibblers such as the one shown here will last forever and save time as well as wear and tear on your hands.
Saving a few seconds here and there may not sound like much but multiply it by thousands of cloves planted and it quickly adds up to a significant amount of time.
If you’re planting very large amounts of garlic, you can extend the dibbler idea and build a frame that will dig multiple holes at one time (sometimes called a multi-dibbler) or even construct a rolling dibbler that can be pulled down rows by hand or with a tractor.
Rolling dibblers can be made in different ways but the basic approach is to take a metal drum or old water heater — basically any steel, cylindrical object with some heft to it — and weld sections of pipe or steel to it that are spaced out to match how you want your garlic or other plants to be set in your rows.
It’s the same concept as using a dibbler; they aren’t necessary but can save a lot of time over the seasons as well as saving the backs and knees a lot of wear and tear as opposed to kneeling and planting clove after clove after clove after clove.


